As part of transferring files to SharePoint Online you will need to use Multi-Factor Authentication (MFA). MFA is a modern technology that is used to secure accounts and data across many different business applications. You may be familiar with MFA from using it with banking, email, or other mobile applications.
Below are guides for using Microsoft Authenticator, Google Authenticator and Authenticator.cc. Any MFA application that you may already use should work similarly.
See the Issues and Solutions section if you are unable to access the file/folder in SharePoint after your account is set up.
Install an MFA Application, If Needed
If you do not already have an MFA application, start by installing one.
Microsoft Authenticator and Google Authenticator can be installed from the App Store for iPhones, and the Google Play for Android phones.
If you do not wish to use a smartphone, Authenticator.cc can be used with a browser. To install:
- Go to authenticator.cc
Select Add to Chrome or Add to Edge, depending on which browser you are using.
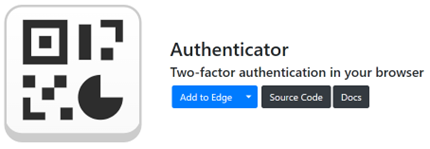
Select Get (for Edge) or Add to Chrome.

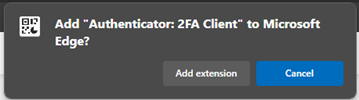
Select Add Extension on the pop up to install.
Initial Setup
Before you begin, have an MFA application installed and available.
A file/folder will be shared with the you (the employer) through an email from ETFSMBIASEmployerSetupQuestions@etf.wi.gov with a link. If you cannot find the link, please email ETFSMBIASEmployerSetupQuestions@etf.wi.gov, and we will resend the link to you.
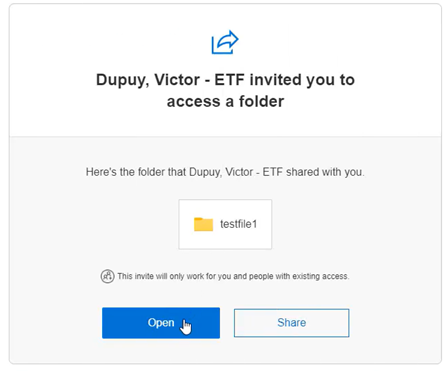
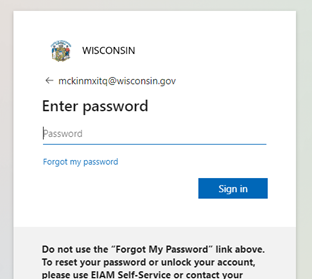
Select Open, which will prompt you to provide your Wisconsin.gov credentials. This is the email address that you currently use with your IAM account.
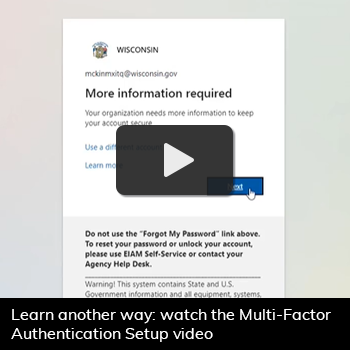
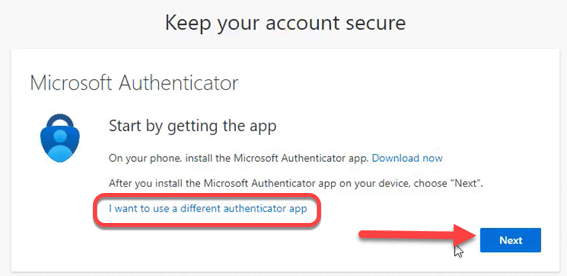
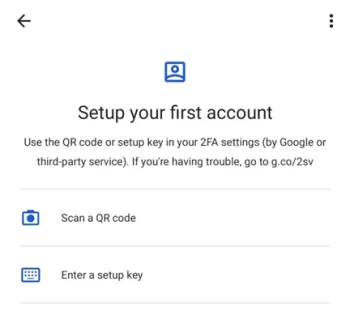
- If you do not have a multi-factor authentication set up, you will be prompted to do so. This screen will appear, asking for more information. Select Next.
- On the "Keep your account secure page" select:
- Next if you are using Microsoft Authenticator.
I want to use a different authenticator app if you are using Google Authenticator or Authenticator.cc.
- For next steps, continue to the section for your application:
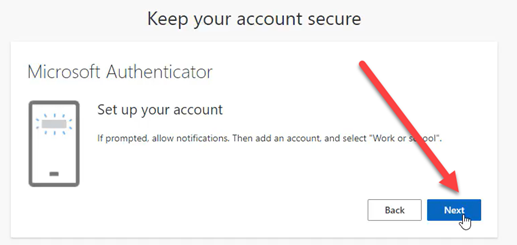
Complete Setup with Microsoft Authenticator
On the "Keep your account secure" screen, select Next.
A personalized QR Code will appear to scan on a mobile device. Open the Microsoft Authenticator App.
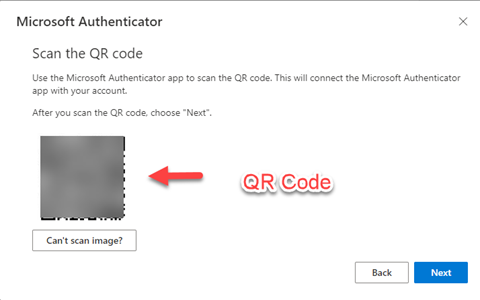
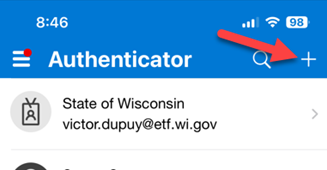
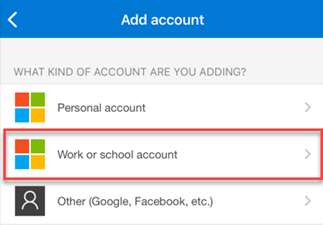
Select the plus symbol, and then select Work or school account.
- Select Scan a QR code. The camera will open.
- Hover the camera so that the QR code is within the box on the phone screen.
- Select Next on the computer once you have scanned the code.
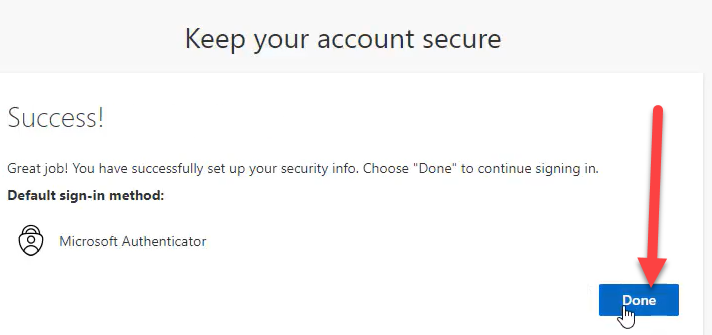
- A notification prompt will appear on the phone screen, requesting you to put in the number that is shown on the computer. Once this is entered, a message saying “Notification Approved” should appear. Select Next.
Select Done.
- You will be asked if you want to Stay Signed in. Most users will answer Yes to avoid having to use credentials more often than necessary.
- Now the browser will be directed to the SharePoint folder, and the document shared will be in that site.
After you've completed the initial setup, you may be prompted for MFA for future logins. After entering your Wisconsin credentials, you will receive a push notification on your phone. Follow the push notification instructions to complete your log in.
Complete Setup with Google Authenticator
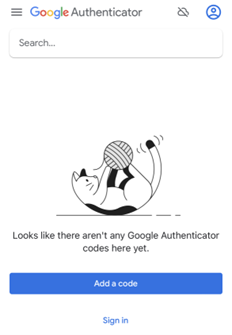
- A personalized QR Code will appear to scan on a mobile device. Open the Google Authenticator App.
Select Scan a QR code. On iPhone, you may first need to select Add a code. The camera will open.
- Hover the camera so that the QR code is within the box on the phone screen.
- Complete any on-screen instructions to finish set up.
After you've completed the initial setup, you may be prompted for MFA for future logins. After entering your Wisconsin credentials, you will receive a push notification on your phone. Follow the push notification instructions to complete your log in.
Complete Setup with Authenticator.cc
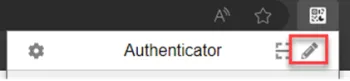
A personalized QR Code will appear to scan. Select the extensions icon on the right side of your browser’s address bar and select “Authenticator: 2FA Client”.

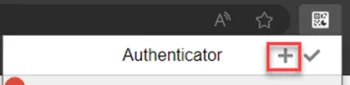
Select the pencil icon to edit, and then select the plus button to add a new account.
Select Scan QR Code.
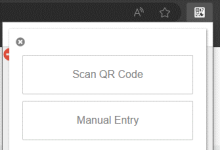
Using your cursor, select and drag to select the QR code, ensuring the entire QR code is selected.

Type in the 6 digits displayed in the Authenticator extension and select Next.
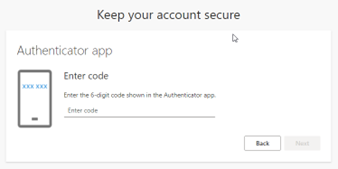
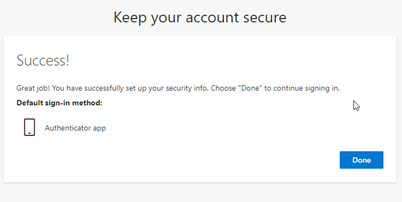
The next screen should indicate ‘Success!’. Select Done to proceed to the site.
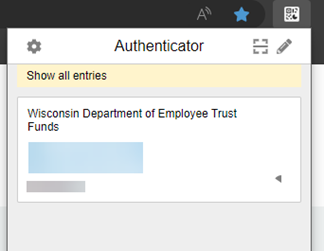
After you've completed the initial setup, you may be prompted for MFA for future logins. After entering your Wisconsin credentials, open the Authenticator extension, find the 6-digit code under "Wisconsin Department of Employee Trust Funds” and enter that code in your browser.
Issues and Solutions

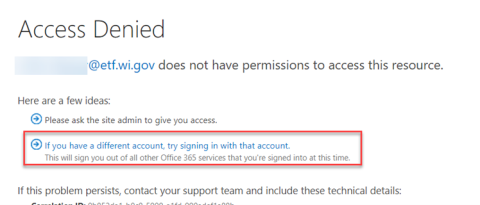
Issue: Access Denied Message
You get an Access Denied message when accessing the shared file/folder in SharePoint.
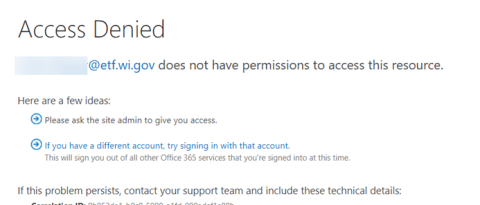
Try one of the following methods to resolve this issue. If neither method works, reach out to your ETF insurance case manager directly. If you do not know who that is, email ETFSMBIASEmployerSetupQuestions@etf.wi.gov.
Solution One: Sign in With a Different Account
Sign out of your current account and sign in with the one given to you by ETF: IAM account followed by @wisconsin.gov.
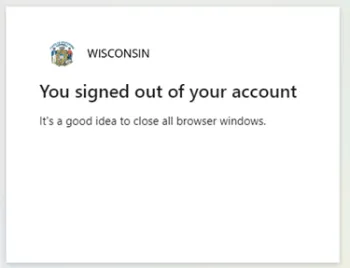
Select the link: If you have a different account, trying signing in with that account.
Your browser will redirect you to sign out of your current account.
- Close your browser.
- Click the link to access the shared file/folder.
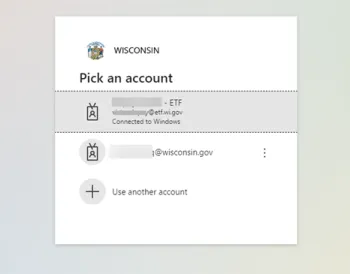
On the Pick an account screen select your IAM account@wisconsin.gov account. If it is not listed, select the Use another account link and log in with your IAM account followed by @wisconsin.gov
Solution Two: Use an Incognito Tab
You can open a private browser tab that does not remember previous login data. In Google Chrome this is known as an Incognito tab, while Microsoft Edge refers to it as an InPrivate window.
To open this type of tab either:
- Hold down Ctrl + Shift + N on your keyboard while using your browser.
- Or, select the triple dot menu and then select New Incognito window (Chrome) / New InPrivate window (Microsoft Edge).
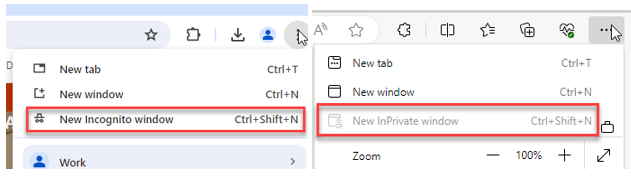
Note: Some organizations manage the ability of using this mode for their devices, which is why InPrivate is greyed out in the example above.
After opening this private mode in either browser, copy and paste the link into that browser tab and try to log in again.